17 March 2006

Oh, the things we will do when avoiding .....


marking
house cleaning
work
sewing
mending
laundry
.....


It started, of course, with a KAL. March's second KAL for the dishclothknitting group. The cloth was one I recognized, although I had never knit it. Round, doily-ish, and just plain fun. After two days, being the impatient soul I am, I raced ahead (despite the disaproval of the teenage daughter) and knit the whole thing. Lovely.

Then, feeling guilty, I started a second one--and finished it, because it was way too fun. Of course, I had to go to the store and pick up a second ball of the yarn because one ball was 5 yards too short to finish the cloth. Then I started a third one, which is still on day two's KAL...

The pattern for the round cloth is here:
http://www.knittingknonsense.com/lacyround.html

Then, I got to thinking...
What if I played with the lace? What if I tried to knit a tea towel for the stove with the same/kind of the same lace edging? What if I didn't want it so gatherered? What about something like a cool hand towel for the bath room? Wouldn't it be neat to make something pretty.
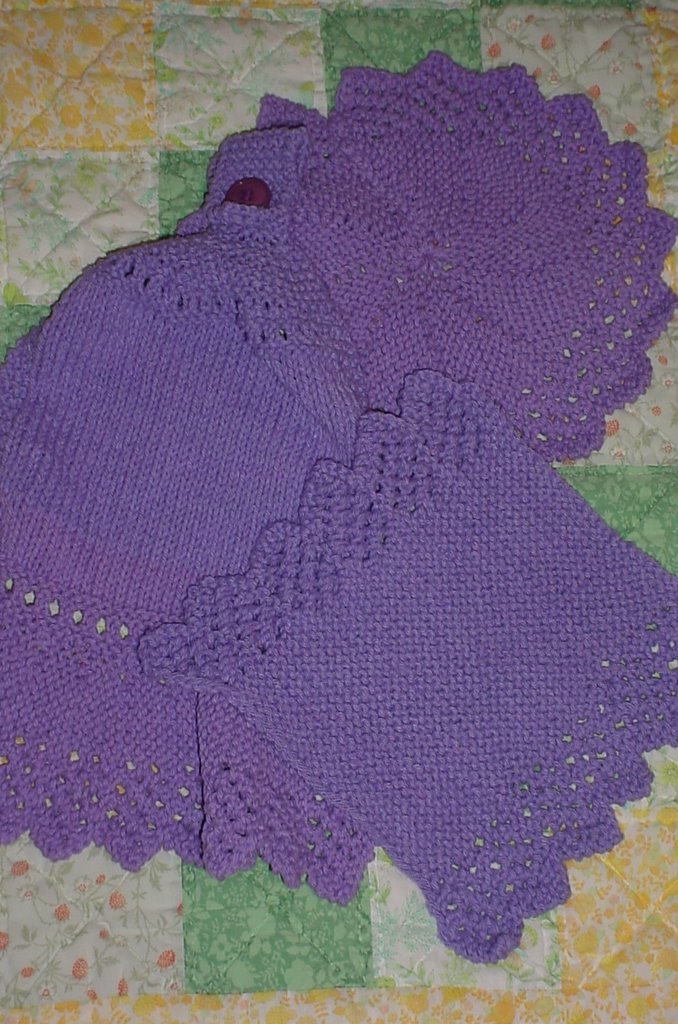
Kitchen Tea set.
This set includes a Button top hand towel, a square dish cloth, and a larger hand towel. The round cloth is copyrighted to the link mentioned above.

These are all made of worsted weight cotton yarn, on size 6 (4 mm) needles, although you can use size 7 (4.5 mm) needles.


I used two 85 g balls of Lily peaches and cream to make the 3 pieces.


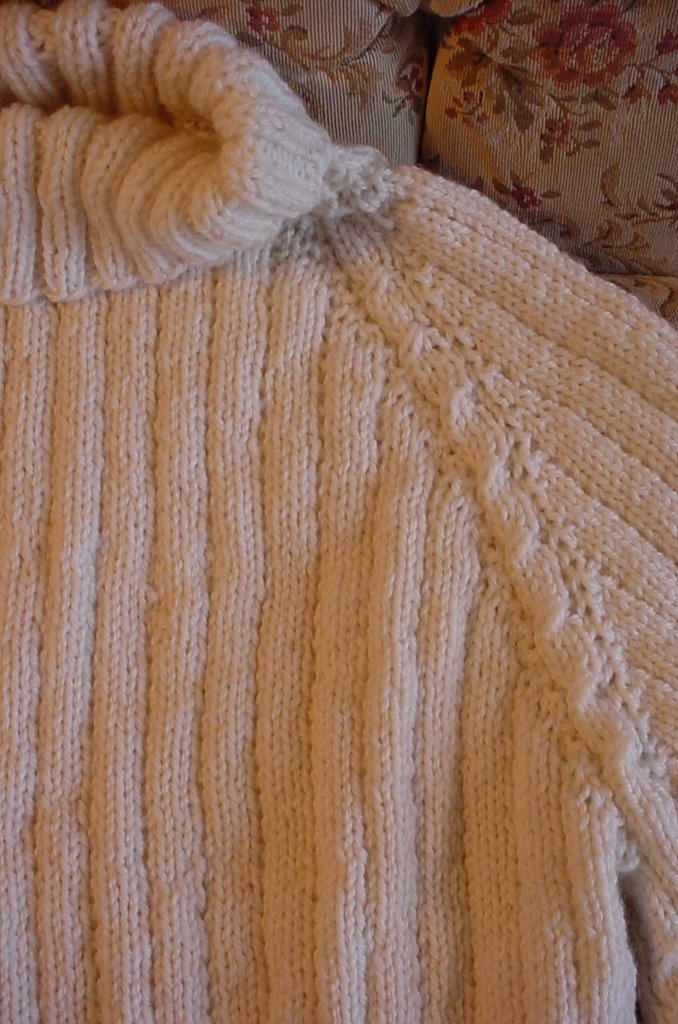
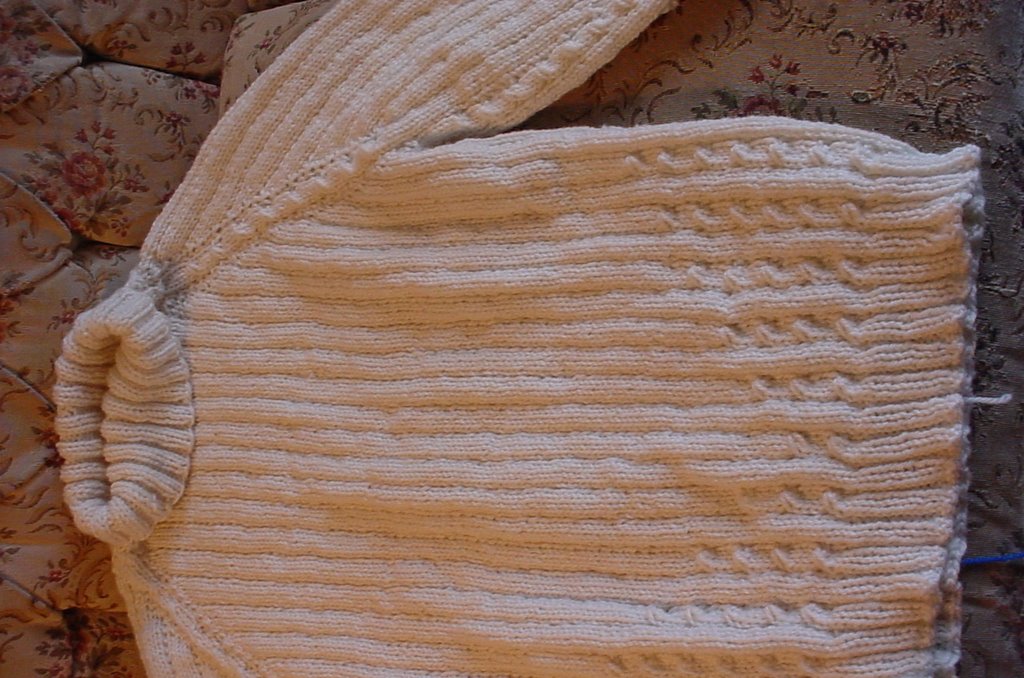
Button top kitchen towel:
There are two choices of edging on this hand towel, a ruffled edge, and a straight edging. The length of the edging on this towel creates the width of the towel. The body of the towel is then picked up across the top of the edging and knit to the desired depth before the button band and tab.


Ruffled Edging:
Cast on 15 sts.
row 1: k2, * yo, k2 tog * twice, yo, k to end.
row 2: sl 1, knit to end
row 3: k2, *yo, k2 tog * twice, yo, k to end
row 4: sl 1, knit to end
row 5: k2, *yo, k2 tog * 3 times, yo, k7, turn
row 6: knit to end
row 7: k2, *yo k2 tog * 3 times, yo, k7, turn
row 8: knit to end
row 9: bind off 4 sts, knit to end
row 10: sl1, knit to end.
Repeat these 10 rows for 12 points, or desired width of tea towel, measured along straight edge. Bind off all sts except the last one. Pick up 3 sts for each repeat (total of 38 sts across).

Straight Edging:
Cast on 12 sts.
row 1: k2, * yo, k2 tog * twice, yo, k to end.
row 2, and all wrong side rows: sl 1, knit to end
row 3: k2, *yo, k2 tog * twice, yo, k to end
row 5: k2, *yo, k2 tog * 3 times, yo, k7, turn
row 7: k2, *yo k2 tog * 3 times, yo, k7, turn
row 9: bind off 4 sts, knit to end
row 11: k2, *yo, k2 tog * twice, knit to end
Repeat these 12 rows for 8 points, or desired width of tea towel, and then bind off all sts except the last one. Pick up 5 sts for each repeat, total of 40 sts across. Decrease to 38 sts in first knit row of eyelet row.

Eyelet edging: This is optional, but it makes the cloth look pretty, and you can thread a ribbon through it for a totally lacy look.
row 1: knit across
row 2: knit across (right side)
row 3: knit across
row 4: k3, *yo, k2 tog * across row to last 3 sts, k3
row 5: knit across
row 6: knit across
row 7: knit across

Body of towel:
row 1: (right side) knit
row 2: (wrong side), k3, purl to last 3 sts, k3.
repeat rows 1 and 2 for 6 inches above the border, or until desired depth has been reached, ending with a right side row.
Repeat eyelets pattern if desired.

Top of kitchen towel (button band)
row 1: (right side) k3, *k2 tog * to last 3 sts, k3
row 2: knit
row 3, 4, 5, and 6: knit across
row 7: k3, * k2 tog * to last 3 sts, k3
row 8, 9, 10, 11 and 12: knit
row 13: k 2, * k2 tog* to last 2 sts, k2
row 14: knit
row 15: k2, k2 tog, k2, k2 tog, k2 (8 sts total).
row 16: knit
Continue knitting on these 8 sts for 17 ridges (34 rows total) or desired length to button hole.
For Button hole:
row 1: k2, k2 tog, wrap yarn around needle twice, k2 tog, k2
row 2: k 3, knit into each wrap of the needle once (creates 2 sts), k 3
row 3: knit across
row 4: knit acros
row 5: k 2, k2 tog, k2, k2 tog, k2
row 6: knit across
row 7: k2, * k2 tog * twice, k2
row 8: knit across
row 9: k1, * k2 tog * twice, k1
row 10: knit across
row 11: bind off all sts.
Sew on button just above the last gather before the tap.


Face cloth, or tea towel.
The edging is knit on either side of this flat cloth. For a wash cloth, cast on 36 sts. For a medium tea towel, cast on 80 sts. For a larger cloth, cast on 100 sts.


row 1 and 2: k2, * yo, k2 tog * twice, yo, knit to end
row 3 and 4: k2, * yo, k2 tog * twice, yo, knit to end
row 5 and 6: k2, * yo, k2 tog * three times, yo, knit to end
row 7 and 8: k2, * yo, k2 tog * three times, yo, knit to end
row 9 and 10: bind off 4 sts, knit to end.
row 11 and 12: k2, *yo, k2 tog * twice, knit to end
Repeat these 12 rows until towel is desired width. Bind off.

My face cloth was 6 repeats.

10 March 2006

Oh there's no place like home for the holidays...

Oh there is no place like home for the holidays,
Particularly since it is March break.
I haven't cleaned anything in at least a month,
and my husband invited fourteen people for lunch...
tomorrow!

But I did actually get all my report cards done,
edited and given to the boss (oh yeah!)
Could be considered that this was a real miracle,
since I spent Febuary riding the Olympics Knitting horse!

4 March 2006

The Olympic Gold


Isn't this just way too cool?


Winning gold is just way too fun.

Thanks so much to Stephanie, the idea master of the Olympic Knitting Event, and all the other organizers who made it happen.

Wow!

What to do with all that lovely leftover Decor wool...


I was very generous when I purchased the wool for my olympic challenge--fearing, I suppose freezing rain or another act of God combined with 'running out of wool' --horrified gasp--would mean that I would not finish my challenge. By the time I finished the Maple Leaf Forever, I had used two balls of red, but only 4 1/2 balls of the cream. What to do with the other almost 6 balls of cream wool, and the various balls that were from the first two frogged attempts.

Wishing for the cottage and wanting something totally comfortable but easy, I cast on 88 sts on my 4.5 mm needles, and began a variation of my grandmother's favourite sweater. My grandmother has knit MILLIONS of these sweaters--all in exactly the same size. I think this is what drove me to learn to knit things that have a hope of fitting ME--not the 6'2" 34" chest model my grandmother believed she (and I) were. I am not knocking grandma's knitting, in any way, but at just over 5' and for most of my life a generous 37" chest, I wasn't so comfortable in grandma's sweater.


Dreaming of the Cottage, baby, sweater


Neckband:
Cast on 88 sts using 4.5 mm needles and magic loop method. Join in round, being careful not to twist sts. K2 P2 ribbing for 5" or desired depth of neckband.
Switch to body pattern , establishing markers for shoulder increases as follows: PM (place marker) K3 (for mock cable) p2 K3 (for second mock cable), PM, K36 (front) placing marker after st 18 for center front, PM, K3 (for mock cable) p2, K3, K36 for back.
body pattern:
round 1 K3, p1 around
round 2: K around round

Short rows for neck:

Note: if you don't want to bother with this, you don't have to, but it makes a more comfortable sweater.

Maintaining body pattern, knit to within 12 sts of center front marker, increasing on either side of cable sts with a p marker st. This translates to knit to within 2 sts of round marker, K front and back, p1, SlM (slip marker), K3, Kfront and back of next 2 sts, K3, SlM, p1, Kfront and back of next st, knit to within 12 sts of center front marker, Sl, Sl, yarn to the front, turn. Wrap first st, purl around row to within 12 sts of center front marker, maintaining all sts as set (purl the mock cable sts from the back; knit the purl sts that set them apart by the markers), sl2, turn, wrap one st.

Repeat short row to within 9 sts of cf marker, remembering to increase on either side of cable, leaving a p st as a divider, and to pick up and knit or purl the wrap with the st it wraps as you come to it, sl2, turn, wrap 1, purl around to within 9 sts of cf marker, sl2, turn, wrap 1. Short row to within 6 sts of cf marker, sl2, turn, wrap 1, purl back to within 6 sts of cf marker, sl2, turn, wrap, continue around, picking up wraps and knitting them with the st, and increasing 1 st on either side of every marker to the marker for the beginning of round. Check sleeve counts: both sleeves should have the same number of sts between markers; both fronts should have same number of sts between markers. If not, on this round only, increase on either side of the markers on the one sleeve so they both match. Otherwise, you will have one sleeve smaller than the other. (Ask me how I know).

Continuing to increase every other row (I like to match the increases and the cables with the pattern round that has the purl sts), on every 6th row when you come to the mock cable, knit the mock cable by knitting the 3rd st from the needle without removing the st, then the second st from the needle without removing the st, then the first st from the needle, and then sliding them all off together.

Maintaining the body and cable pattern, increase on either side of the cable, every other round, until the depth from the base of the neck is 9", or desired length to underarm divide.

Divide for the underarms:
Knit across sleeve sts, place on st holder, knit across front sts, maintaining pattern, knit across sleeve sts, place sleeve sts on holder, knit across back sts maintaining pattern. Cast on 12 sts, or enough sts to complete pattern across body (up to 12 sts). Knit across front body; cast on 12 sts, or enough sts to complete pattern repeat (up to 12 sts). Knit across back sts, maintaining pattern. PM. My sweater had 200 sts total, including the underarm sts, which was 25 repeats of the 4 st pattern in front, and 25 repeats of the 4 st pattern in back.

Knit continuing to maintain pattern for 4 inches, or until you want to start the mock cable pattern for the body.

Place markers at center underarm 'cable'. The cable pattern starts every other cable, every 6th round. In other words, for your first cable set, knit to one cable past the center underarm cable, mock cable these three sts, maintain pattern to one 'cable' before underarm cable, mock cable these three sts, knit underarm cable plain, mock cable next cable, knit across to last cable before underarm cable at beginning of row, mock cable these three sts. Continue with body pattern for 5 more rows. Next cable round, underarm rib set plain, mock cable previous cable, next rib set plain, mock cable next rib set, knit to within 2 rib sets of previous cable, mock cable rib set, one rib set plain, mock cable previously cabled rib set, underarm rib set plain, cable previously cabled rib set, next rib set plain, cable next rib set, continue across to 2 rib sets before previous cabled rib, mock cable rib set, one rib set plain, mock cable rib set (previously cabled rib), next plain rib set should be the underarm and the plain rib.

I am sure there is an easy way to write this, but essentially, you are adding a mock cable to the pattern on each side every sixth row, to create the center front diagonal rib. Knit continuing pattern established to 13" or desired body length before ribbing. Change to k2 p2 ribbing, and rib to 15" from underarm cast on, or desired body length.

to be continued

to be continued